

Protection profile access
1
Open protection profiles
In the Gcore Customer Portal, navigate to DDoS Protection > Protection profiles.
2
Review profiles
Review the list of available profiles, shown with their assigned networks and template.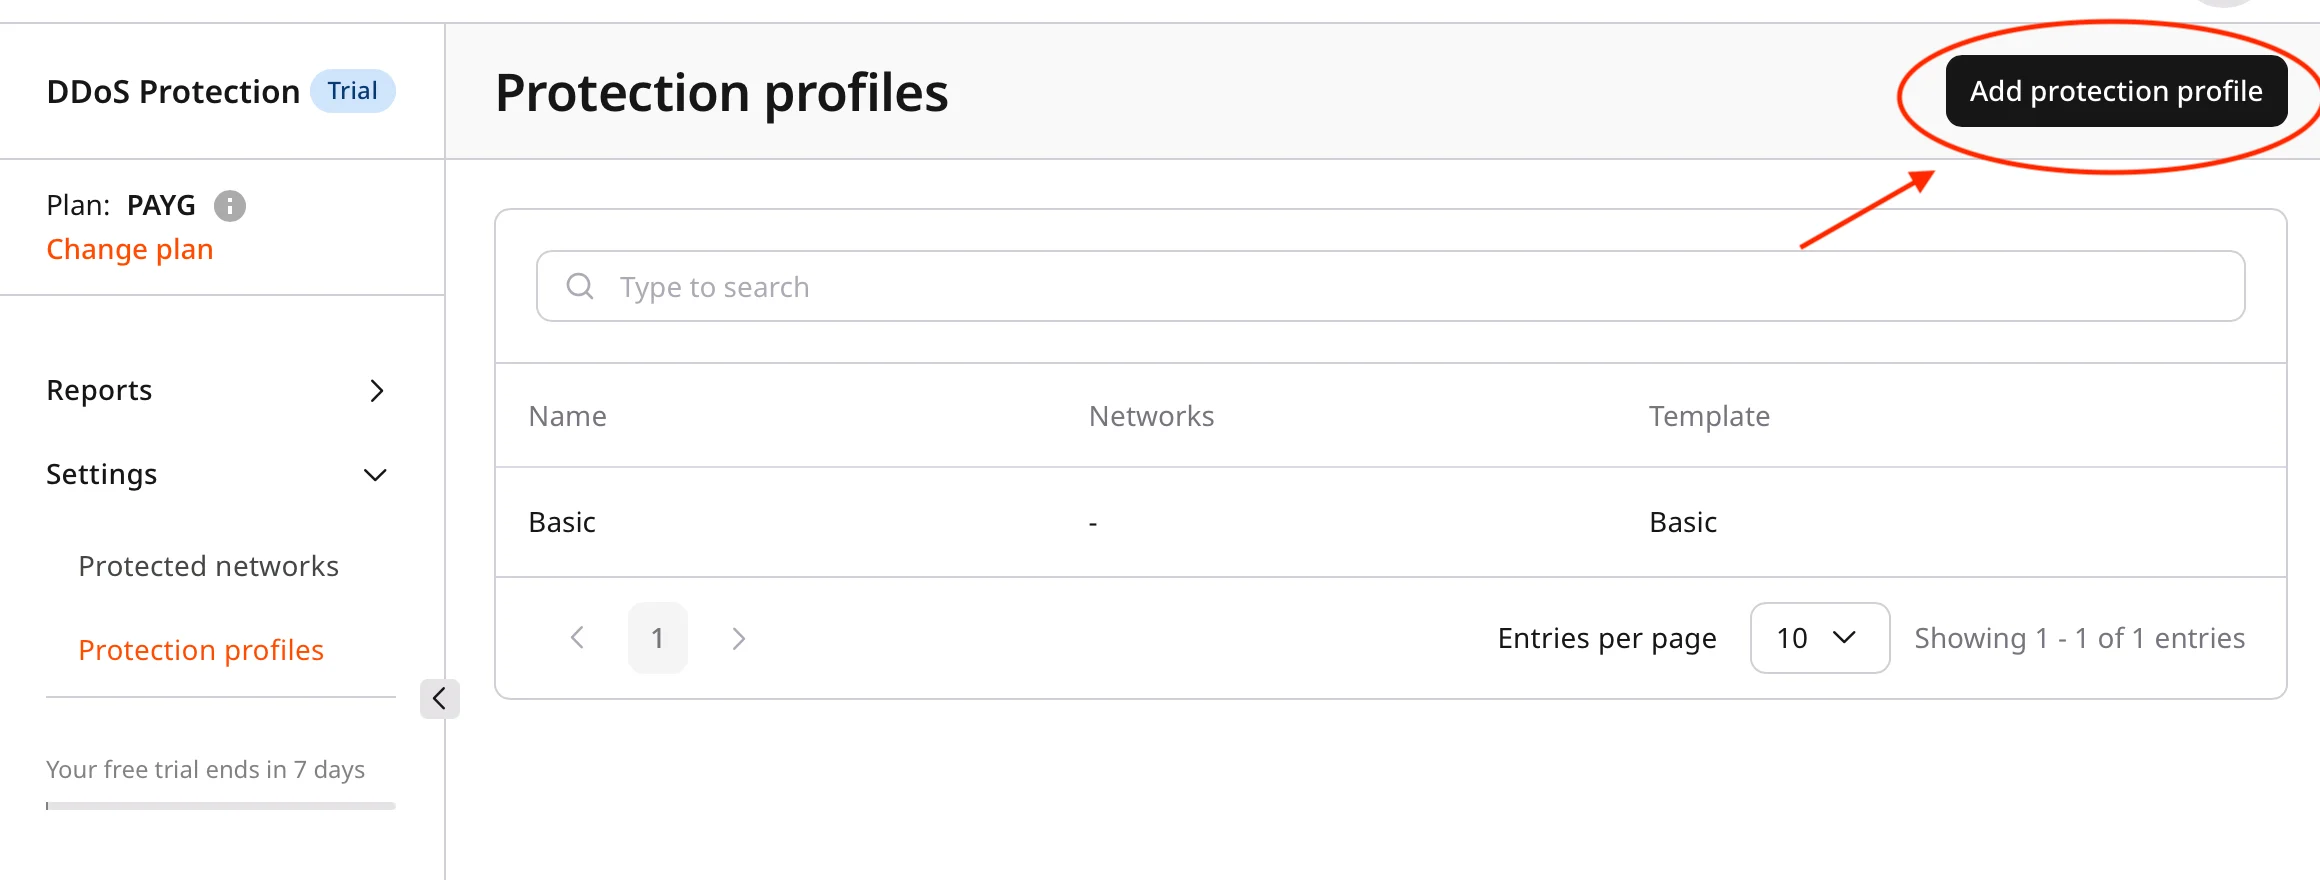
Profile creation
1
Add a protection profile
Click Add protection profile.
2
Select the Basic template
Select the Basic template, which pre-populates four default catch-all rules for TCP, UDP, ICMP, and other traffic. Other templates provide different default configurations and available policies.
3
Enter a profile name
Enter a profile name. Use a clear and descriptive name for easier identification.Example: 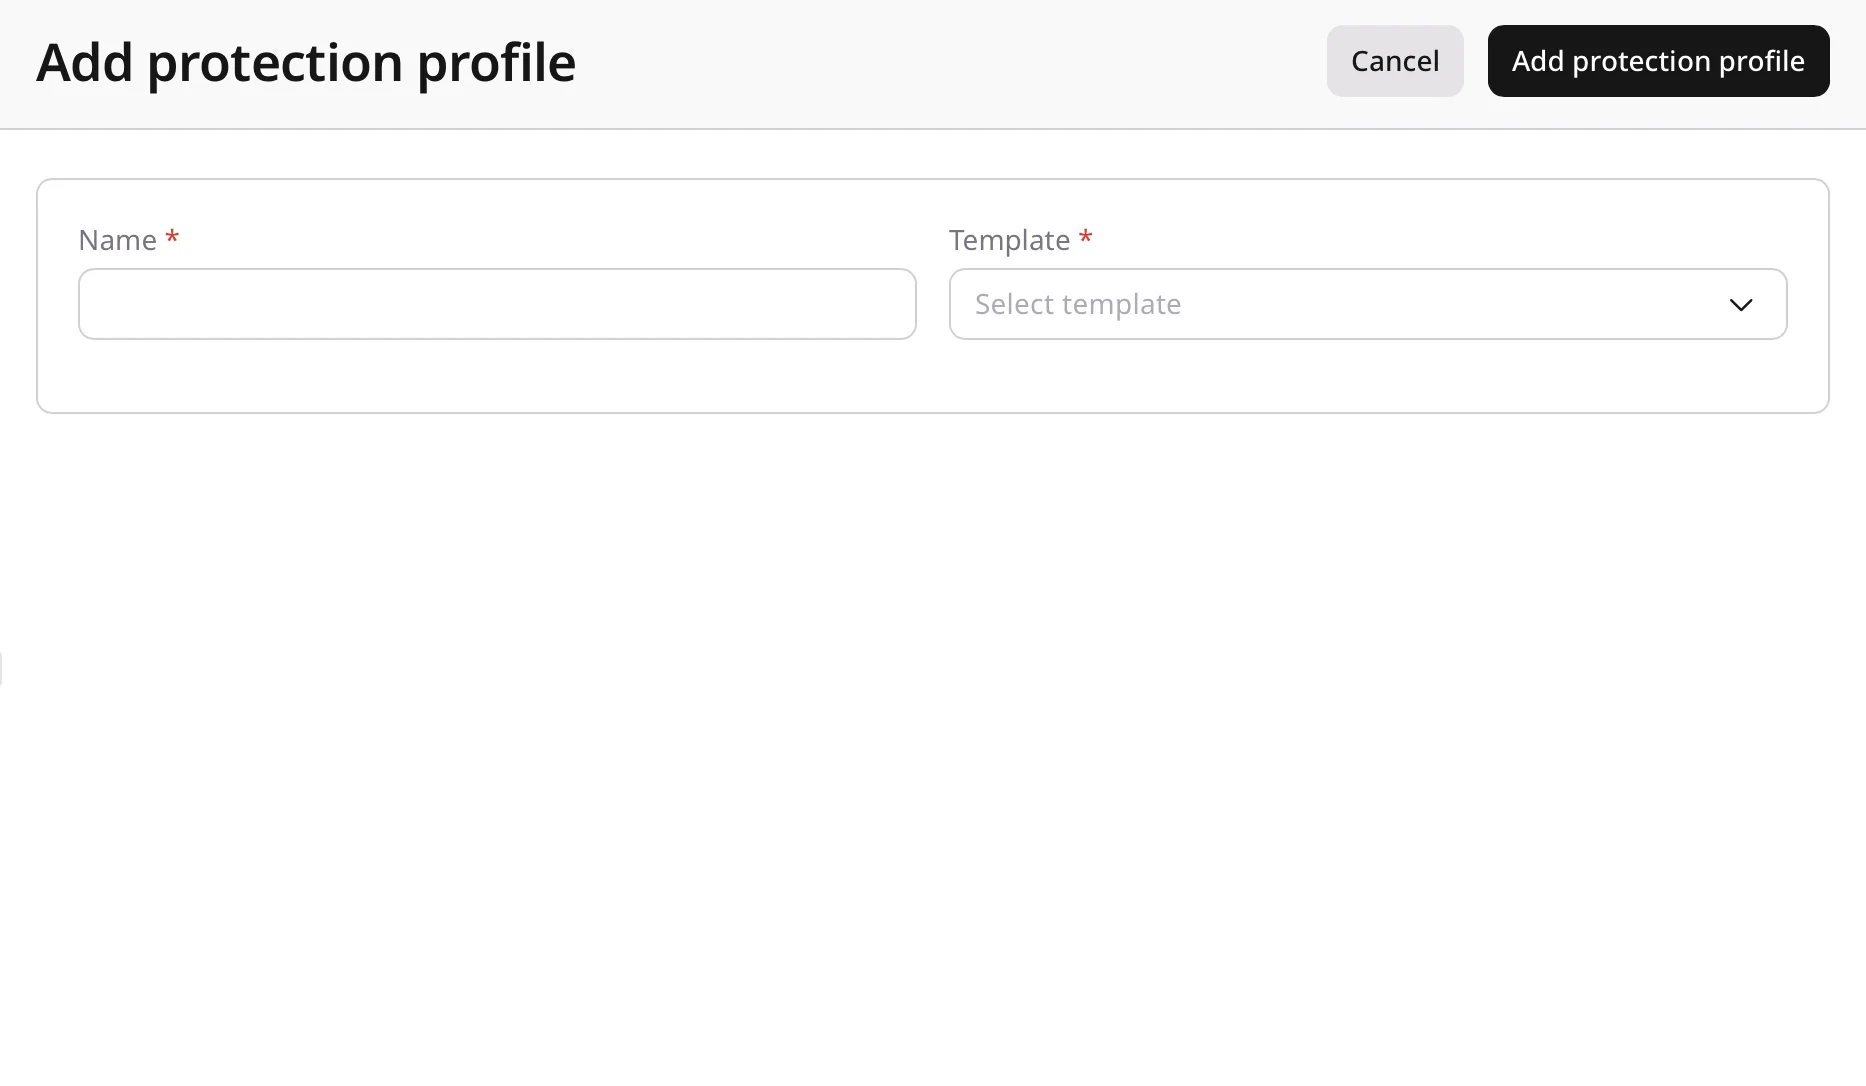
High-security web server profileRule and policy configuration
A protection profile has two connected configuration areas: rules on the Rules tab match traffic and choose which policy to apply, while the Policy tab sets shared thresholds, including rate limits and the GEOIP list, that some of those policies reference.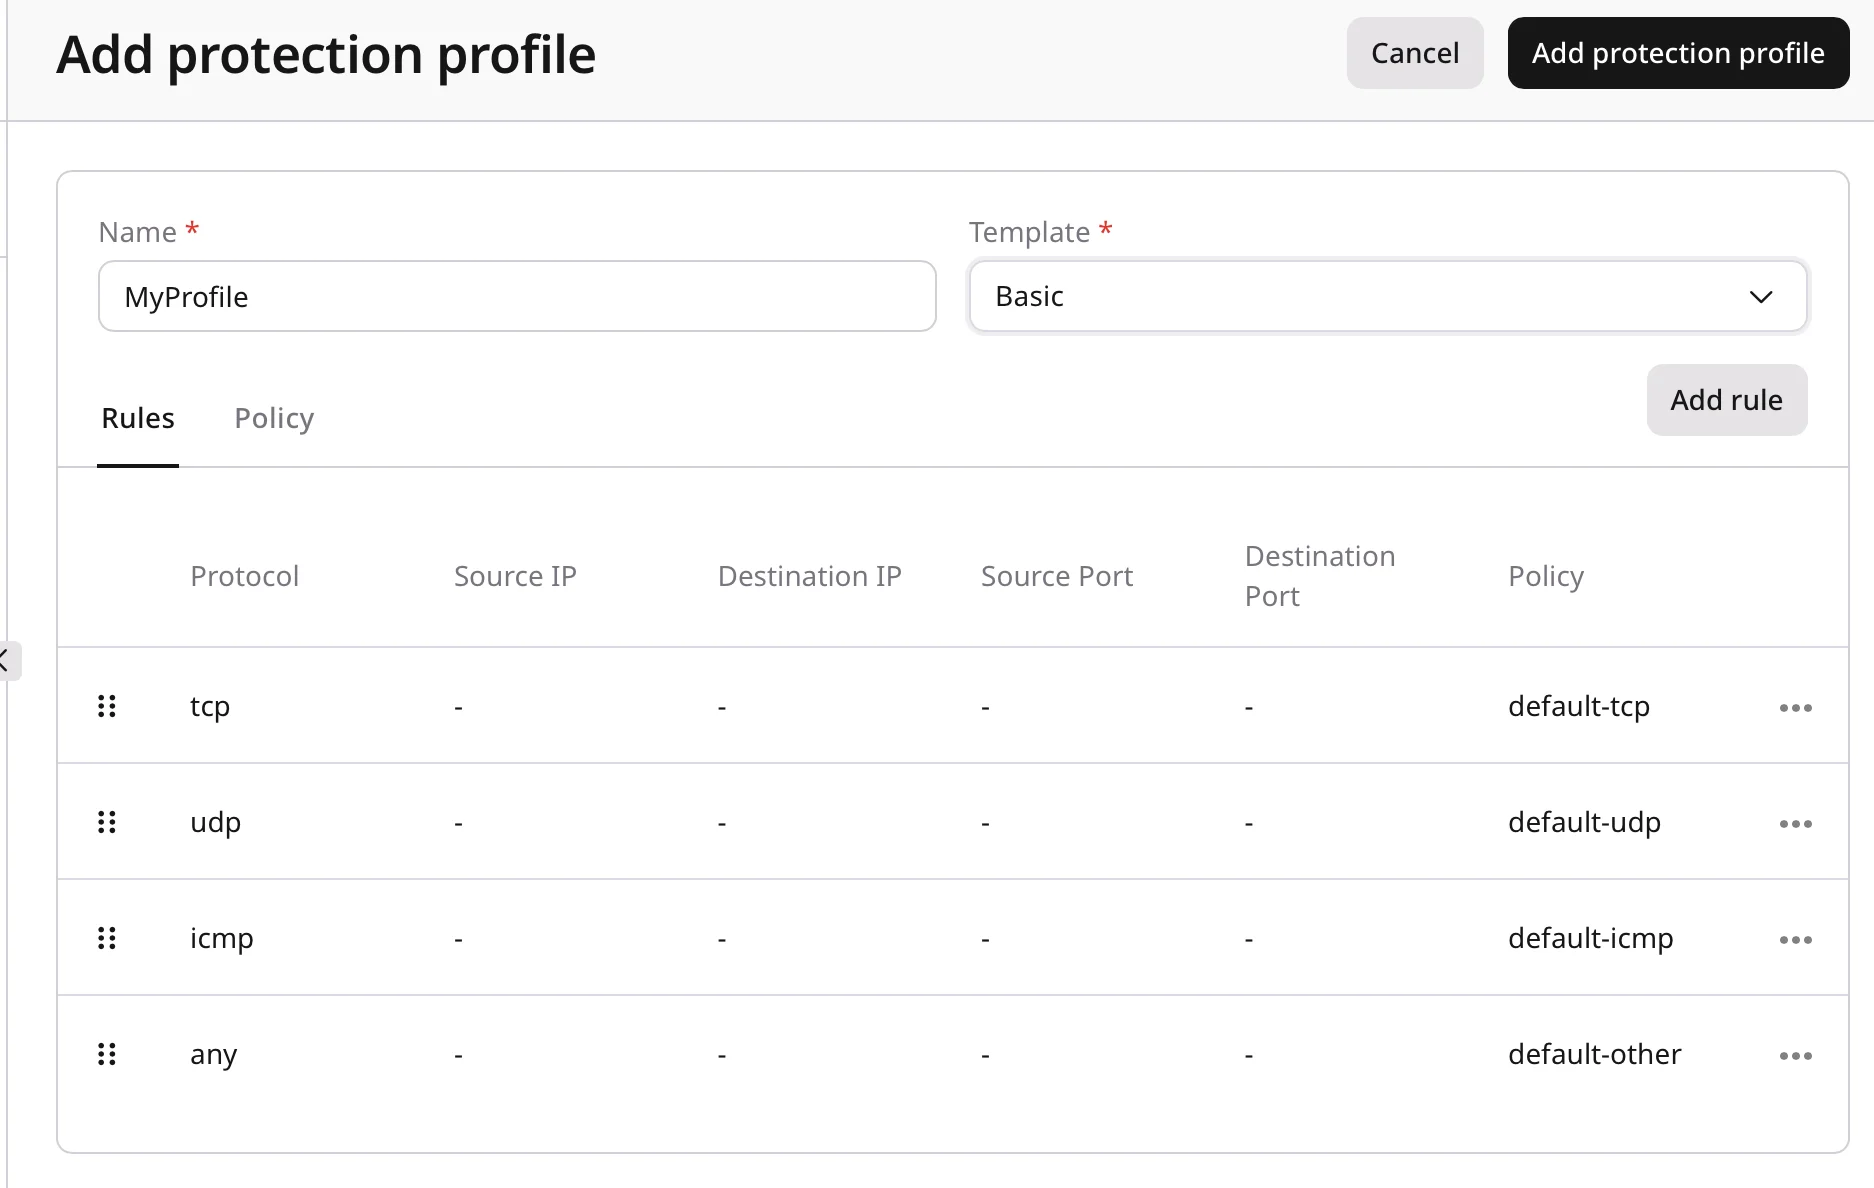
How rules and policies work
Rules define traffic-matching criteria and apply a selected policy to matching traffic. Selecting the Basic template pre-populates four default rules that match TCP, UDP, ICMP, and other traffic to the corresponding default policy; add more rules to layer specific protections on top of these defaults. Policy IDs and what each policy does are in the Policy reference.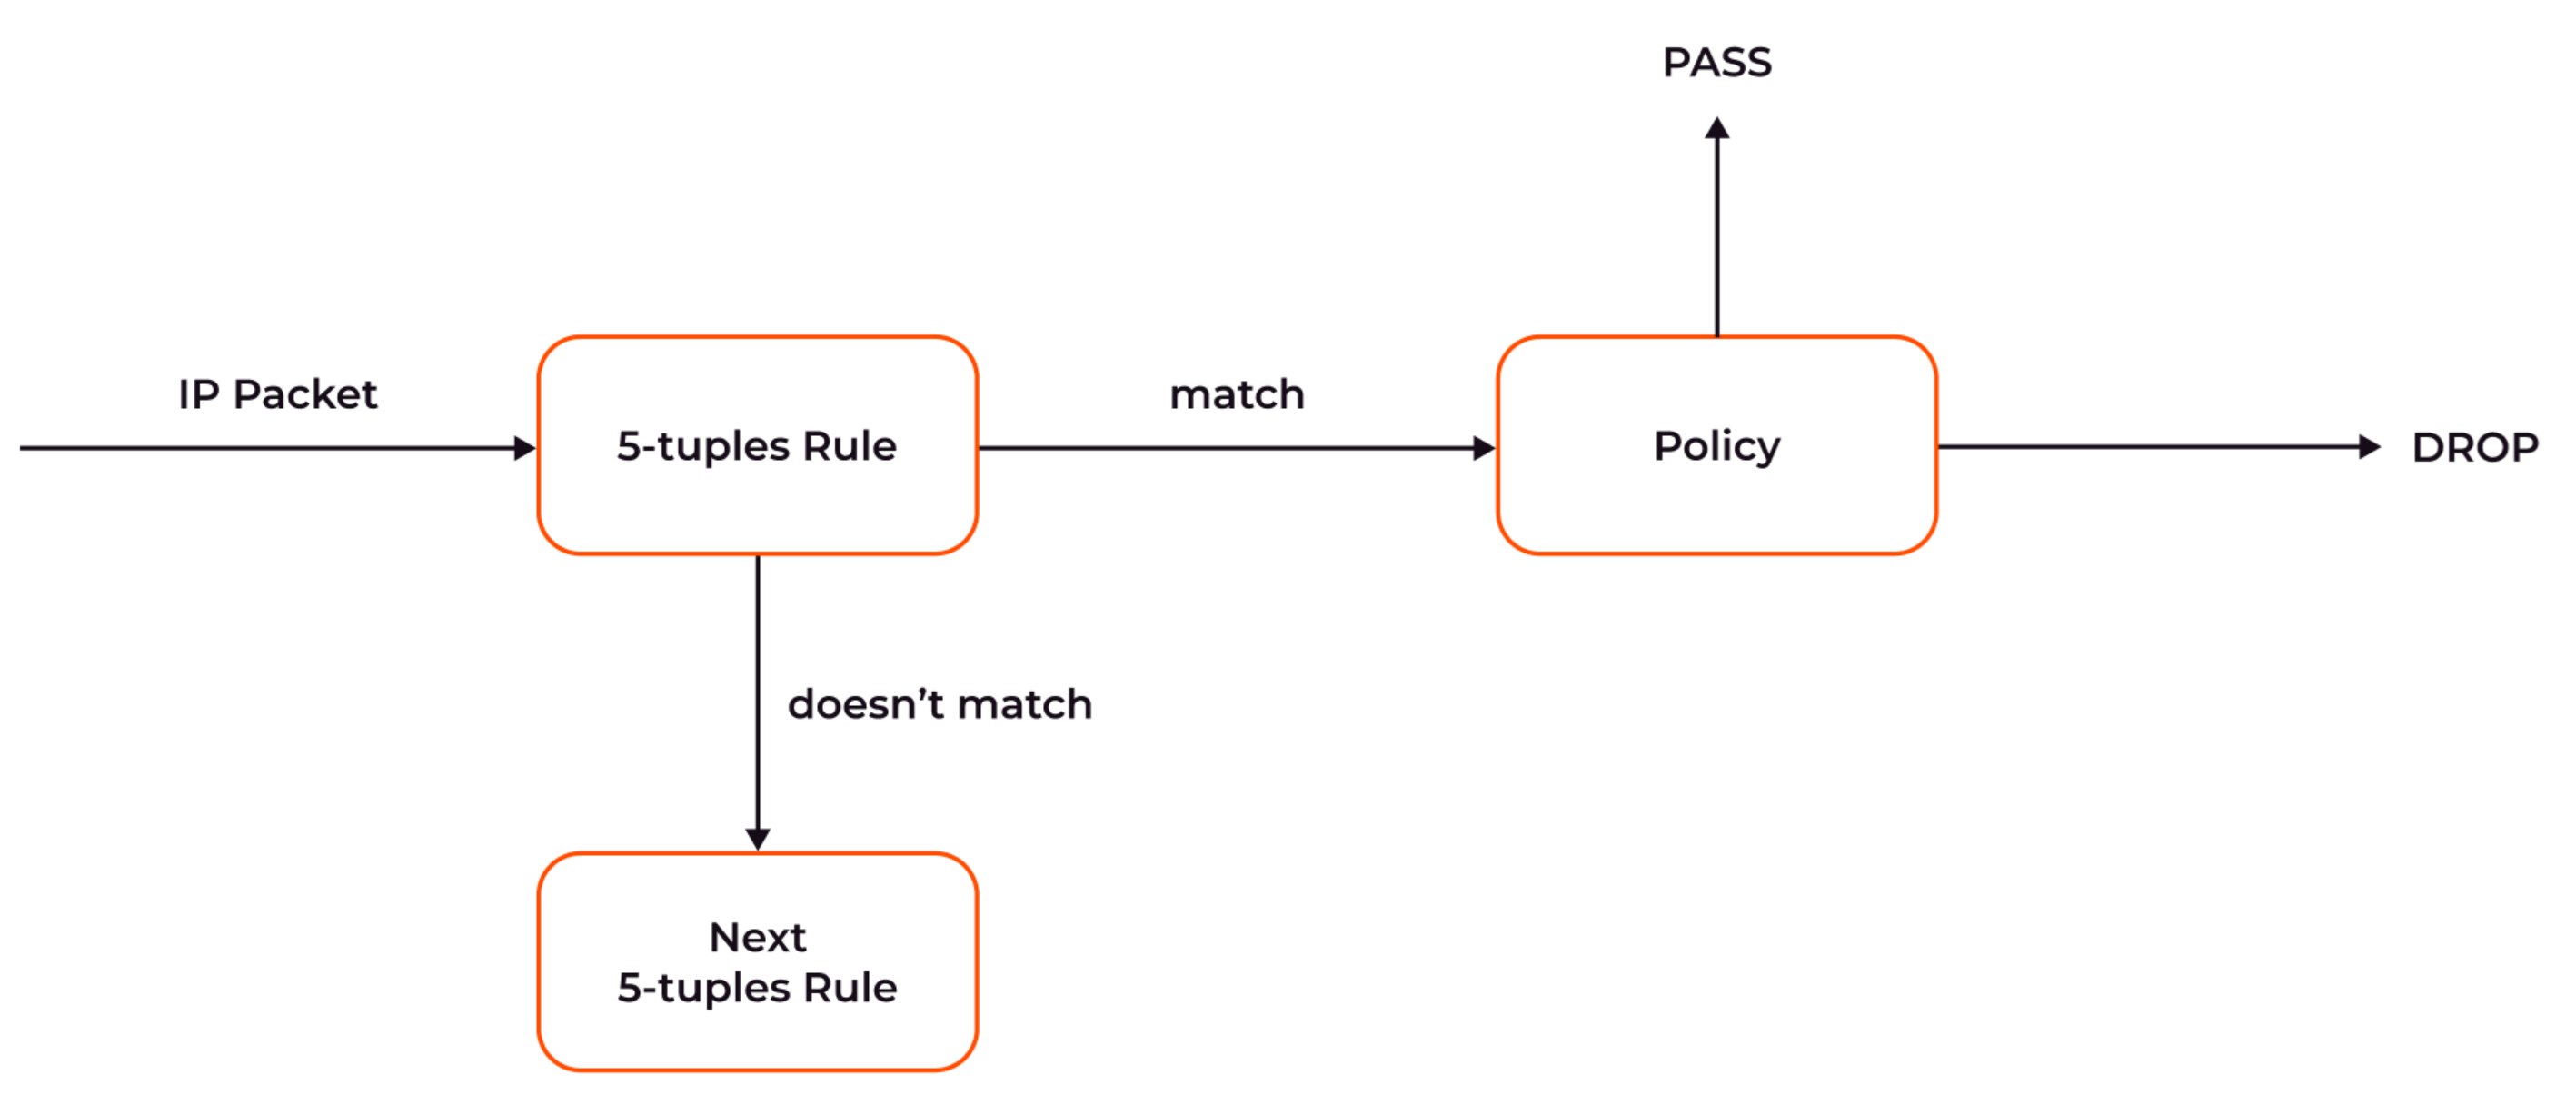
Rule creation
Add a rule to match specific traffic and apply a policy to it.1
Add a rule
Click Add rule.
2
Configure the rule
Complete the required fields:
- Protocol: Select the protocol (TCP, UDP, ICMP, or other).
- Source IP: Enter a source IP address or range.
- Destination IP: Enter a destination IP address or range.
- Source port: Enter a port number or range.
- Destination port: Enter a port number or range.
- Policy: Select the policy to apply.
3
Set rule priority
Drag the rule up or down to set its priority. Because the Basic template’s catch-all TCP, UDP, ICMP, and other rules match broad traffic patterns, a new rule for specific traffic must sit above the corresponding catch-all rule.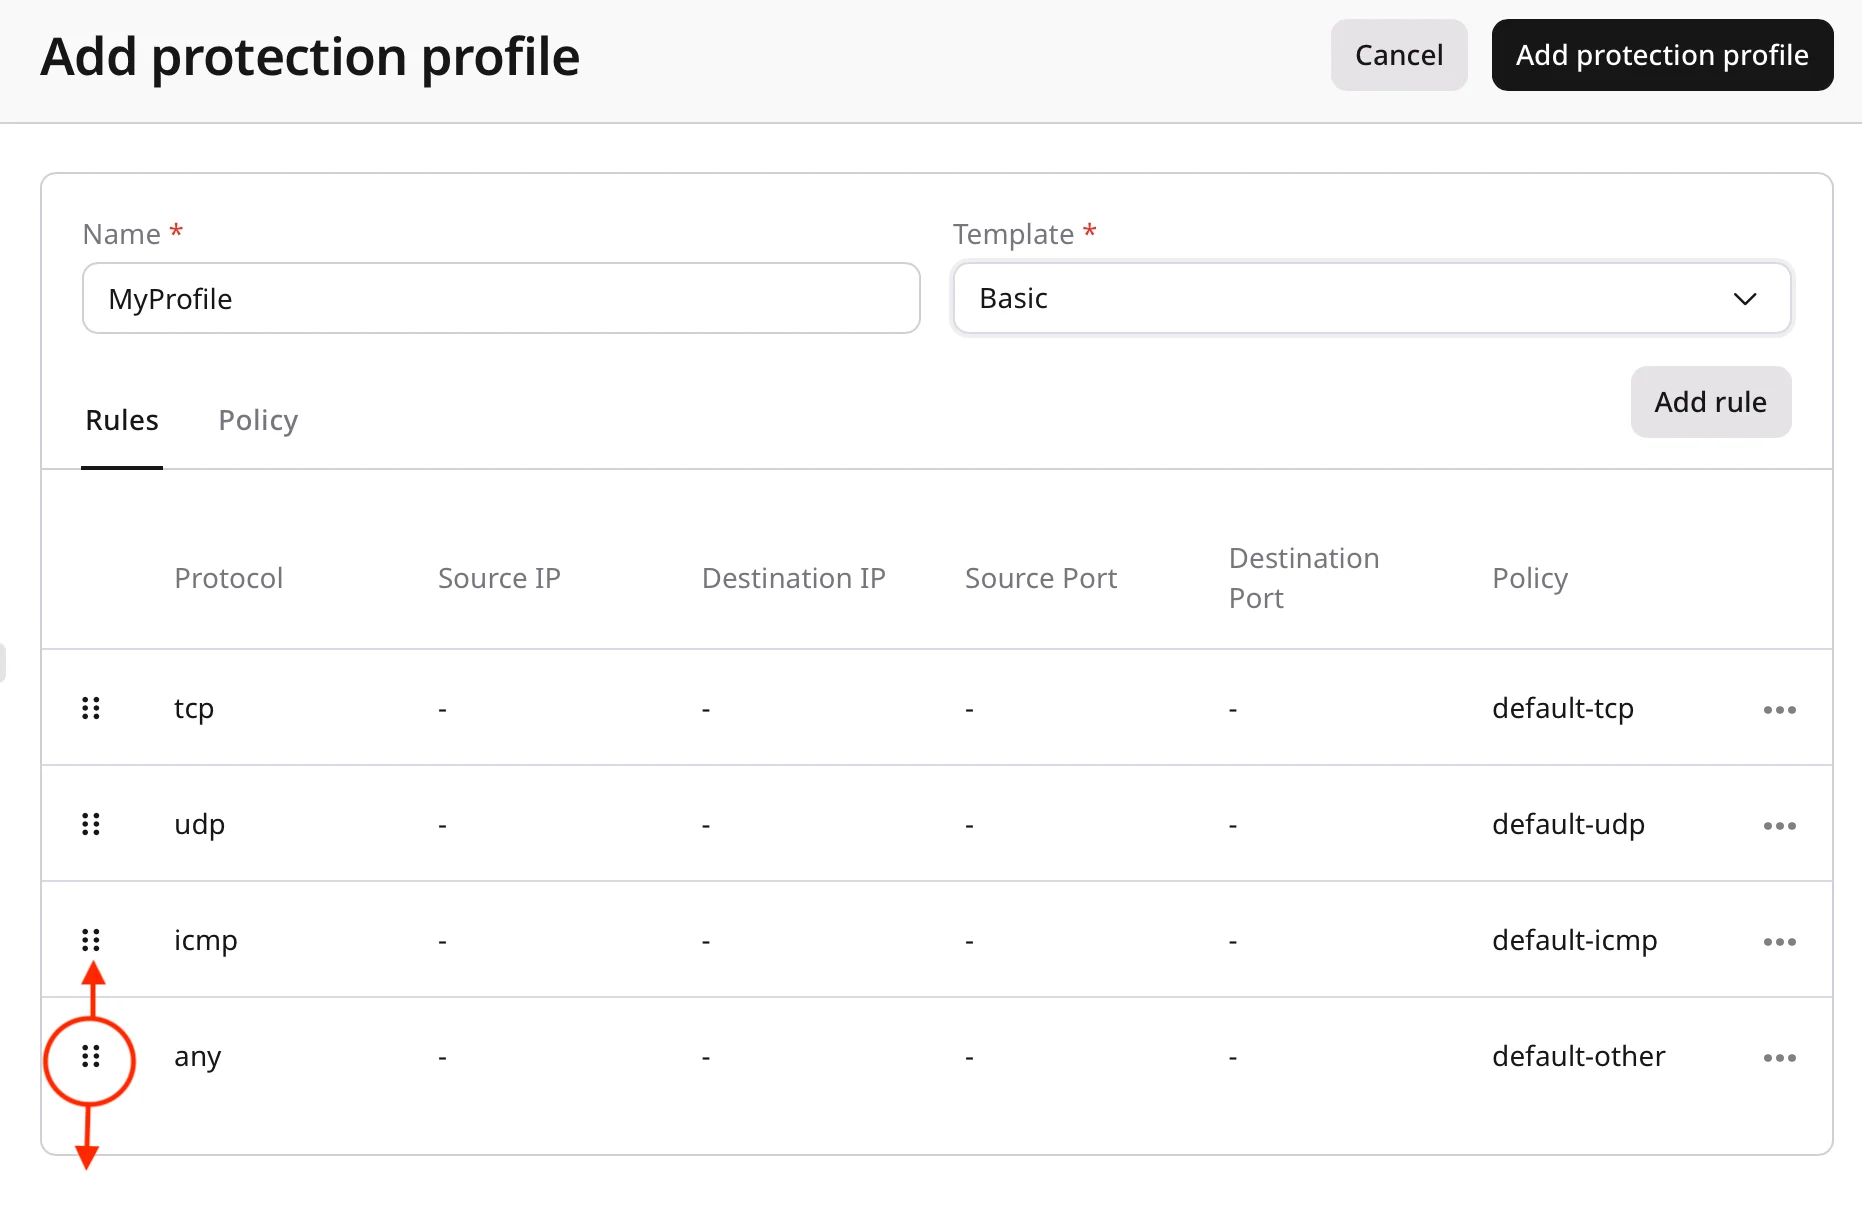
4
Save the rule
Click Save.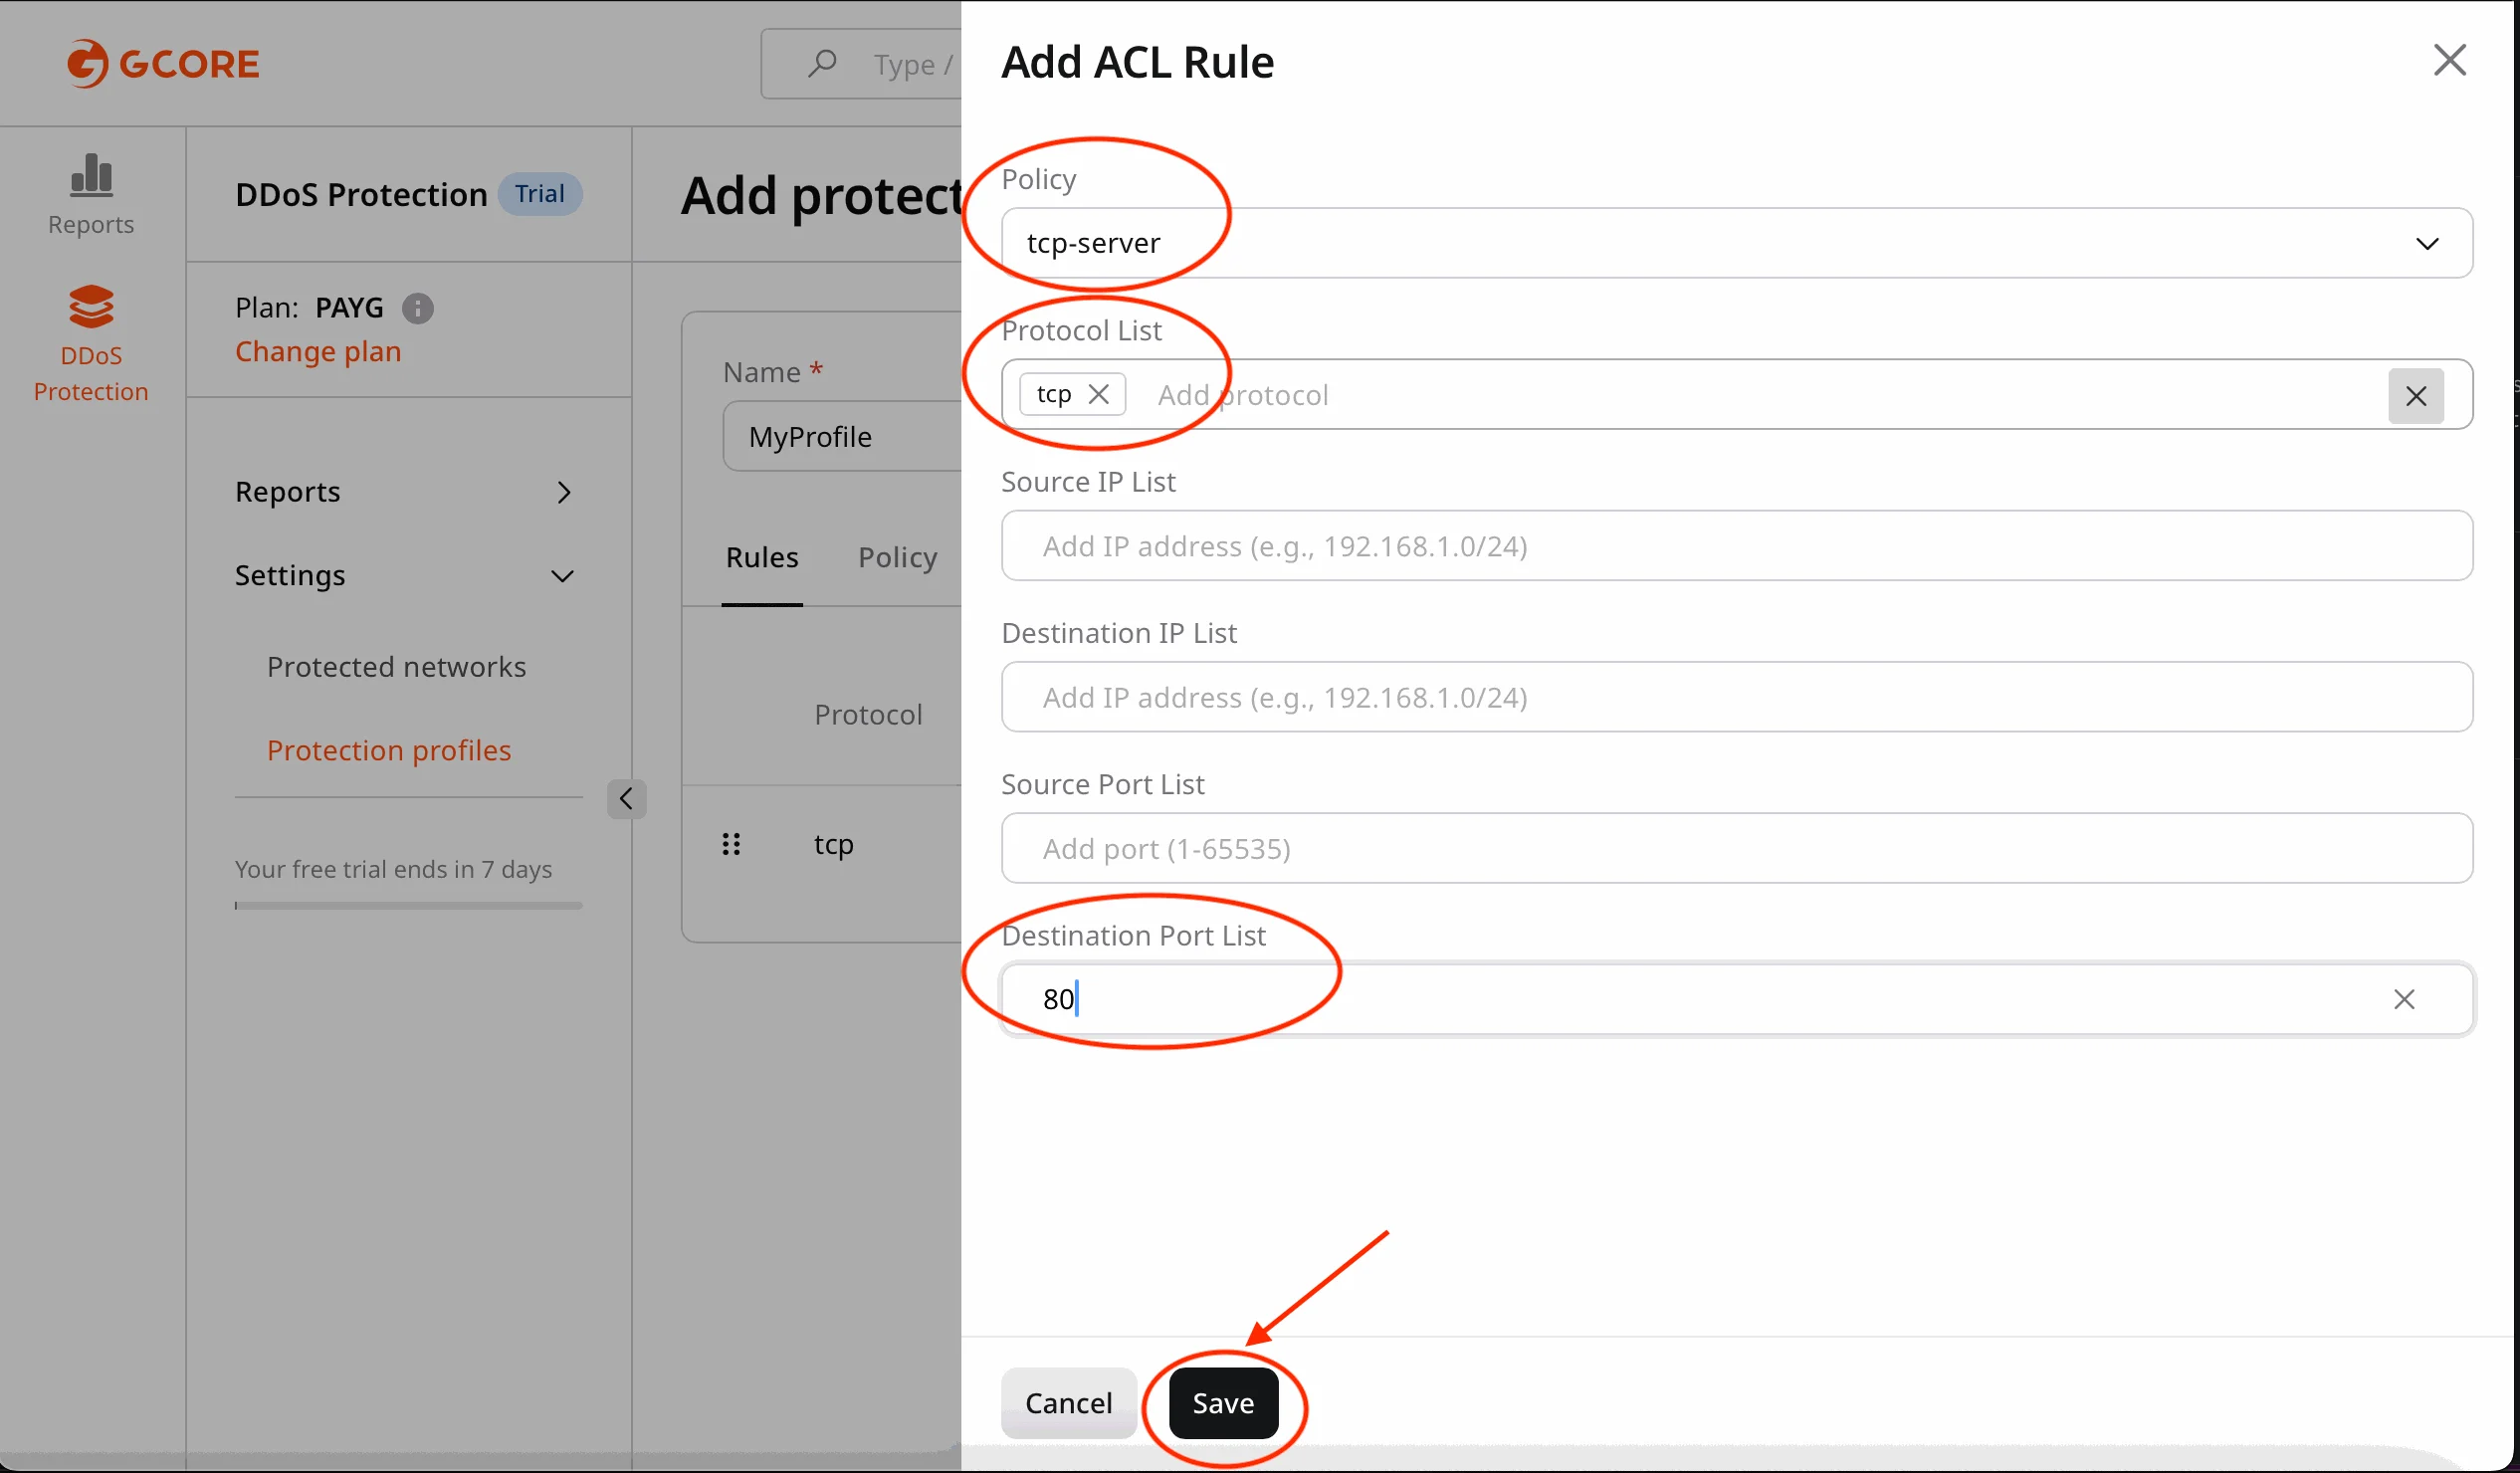
80 (HTTP) and apply the tcp-server policy.
Policy configuration
The Policy tab sets profile-level rate limits and the GEOIP list. Available fields depend on the selected template.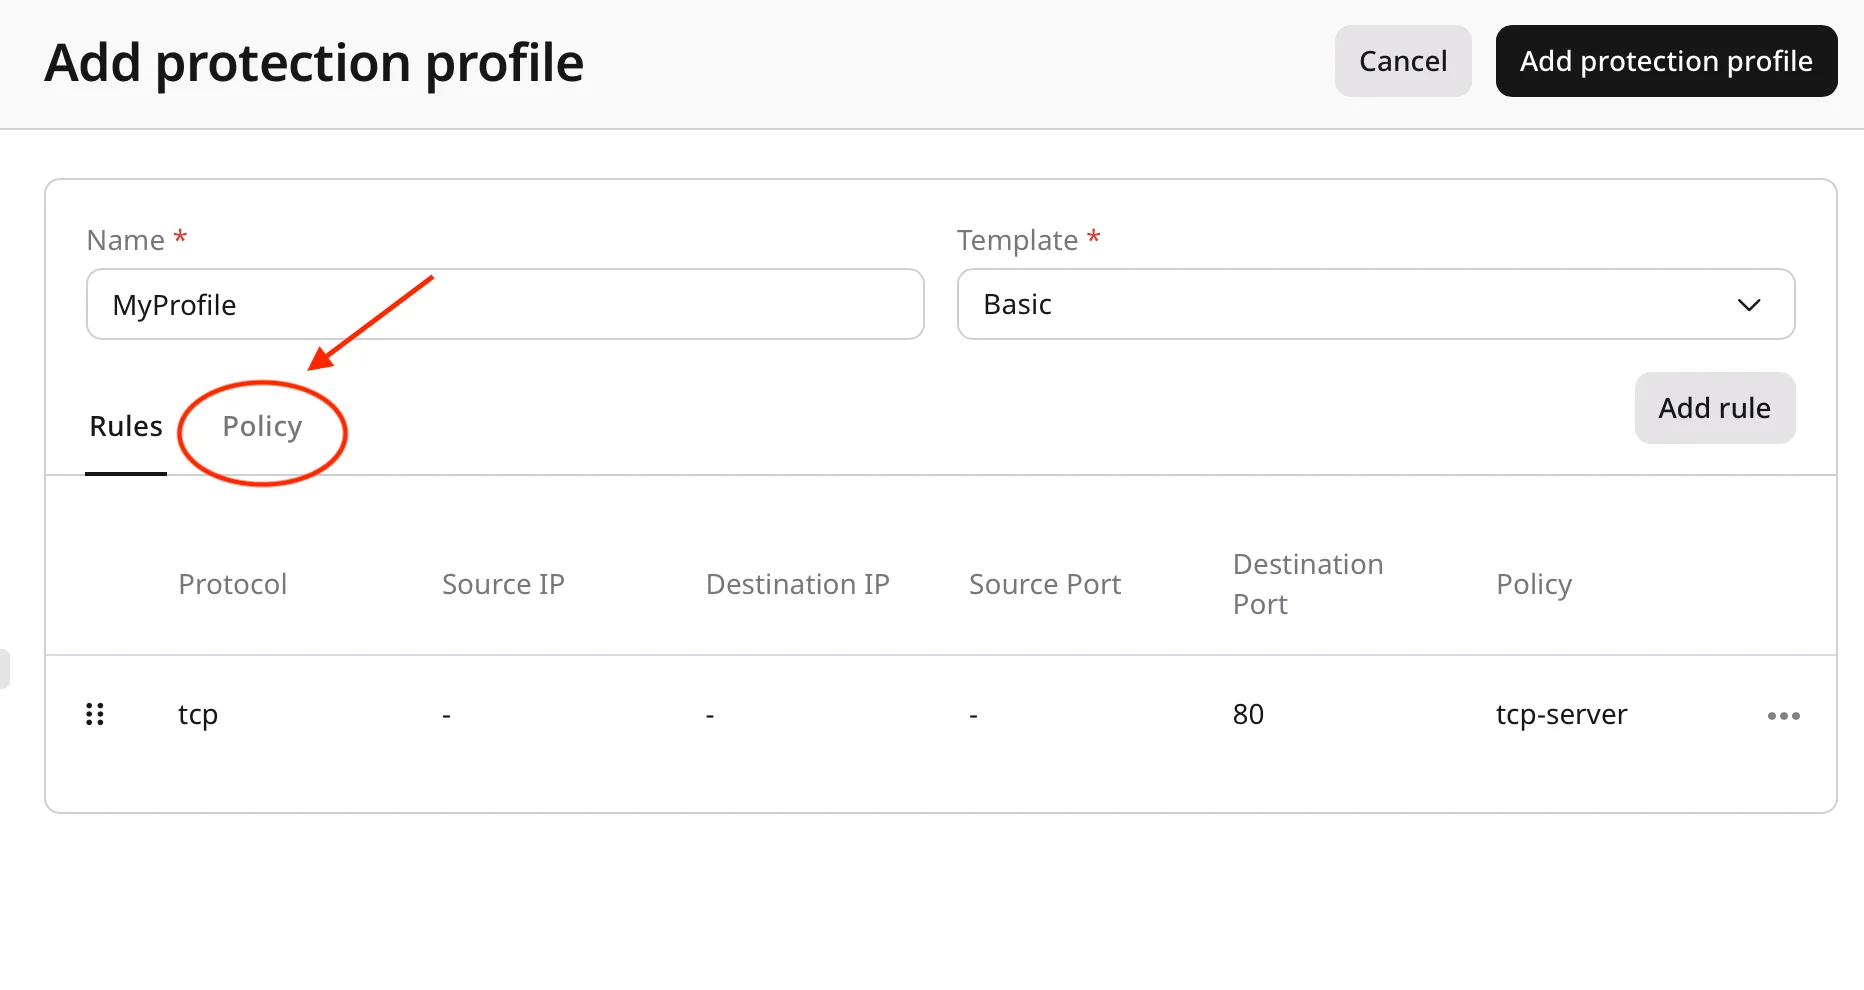
- GEOIP list: list of countries used by the
geopolicy. Configure the list and select whether the listed countries are Allowed or Denied before adding a rule that uses thegeopolicy. - Rate limiter low: packet-rate cap for traffic matched by the
ratelimiter-lowpolicy, up to 50 kpps. Default: 50 kpps. - Rate limiter medium: packet-rate cap for traffic matched by the
ratelimiter-mediumpolicy, up to 150 kpps. Default: 150 kpps. - Rate limiter high: packet-rate cap for traffic matched by the
ratelimiter-highpolicy, up to 300 kpps. Default: 300 kpps. - Rate limiter geo: packet-rate cap applied to traffic matched by the
geopolicy, up to 300 kpps. Default: 300 kpps.
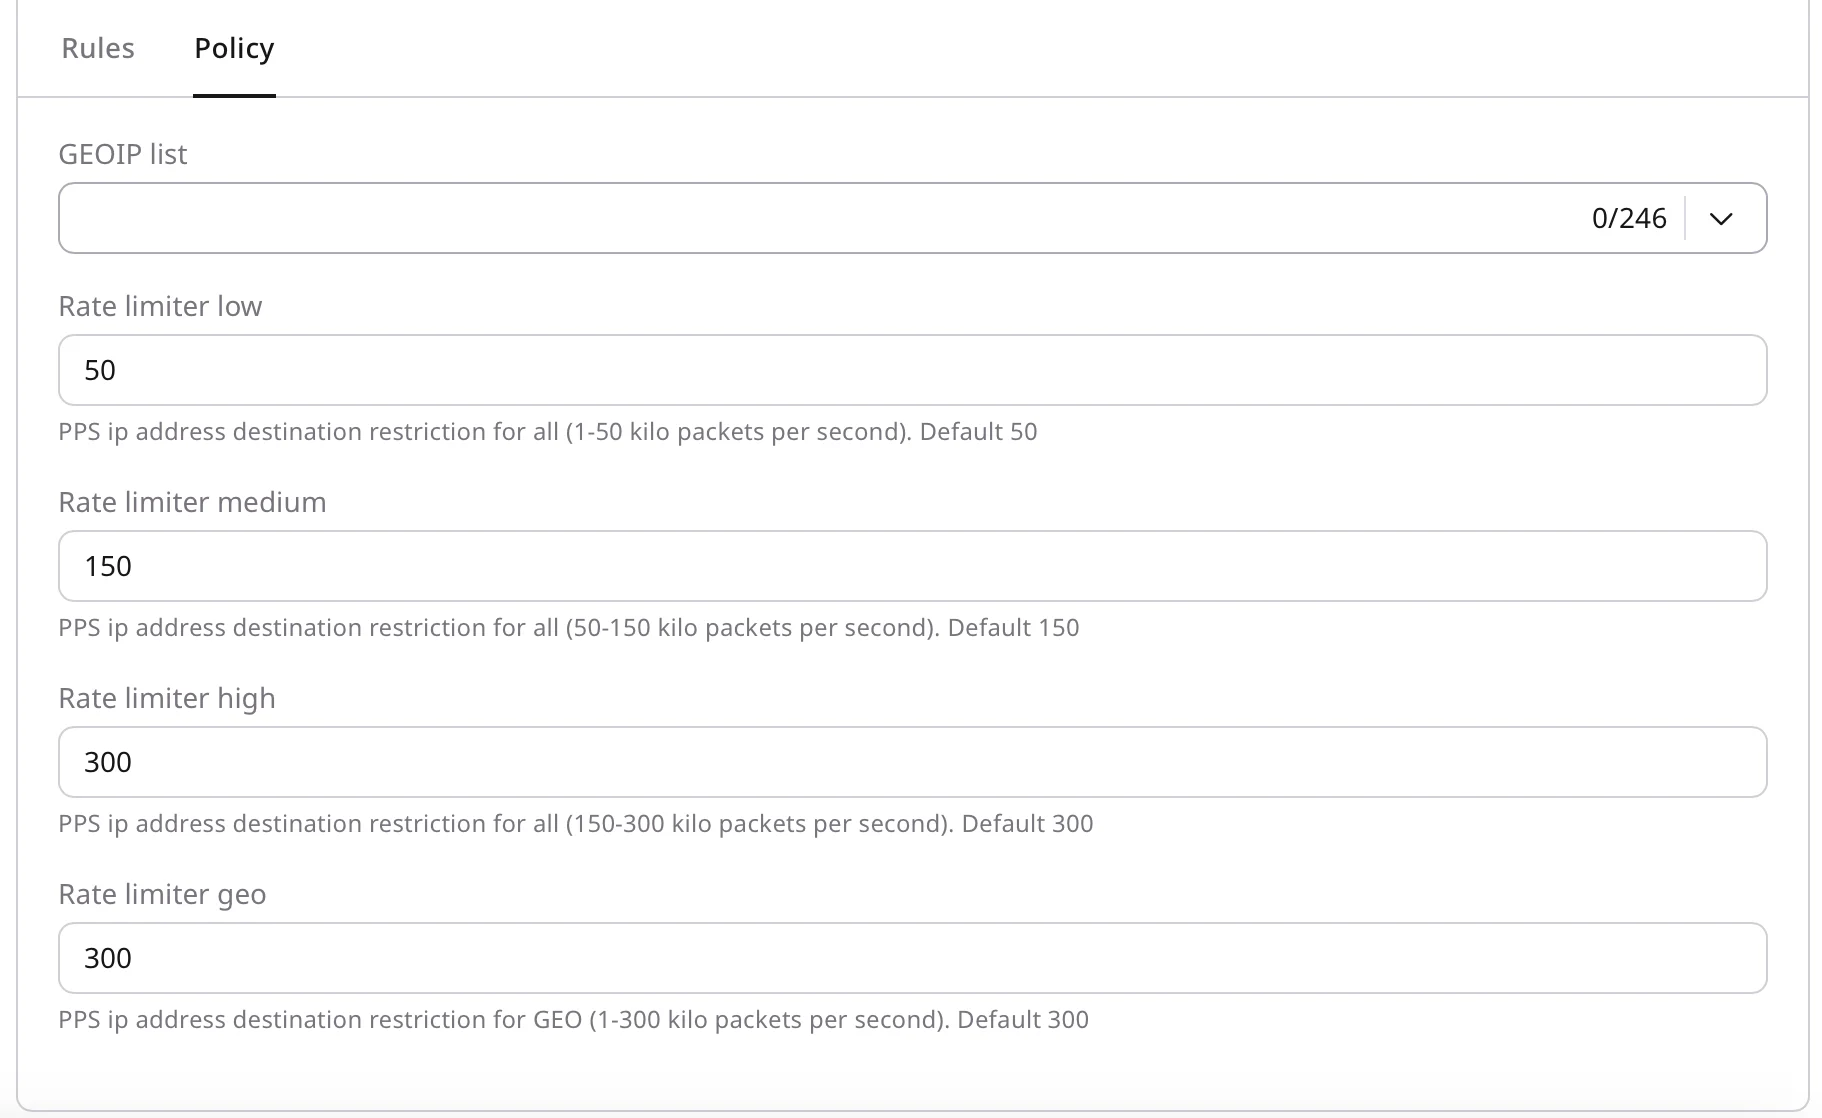
geo or rate-limiter policies in a rule.
To let trusted traffic bypass inspection, add a rule on the Rules tab with the allowlist policy applied to the trusted source IP range. On Enterprise plans, matching traffic bypasses inspection entirely; on public plans, it remains subject to filtering.
Profile saving
1
Review the profile
Review the configured rules and policies.
2
Save the profile
Click Add protection profile.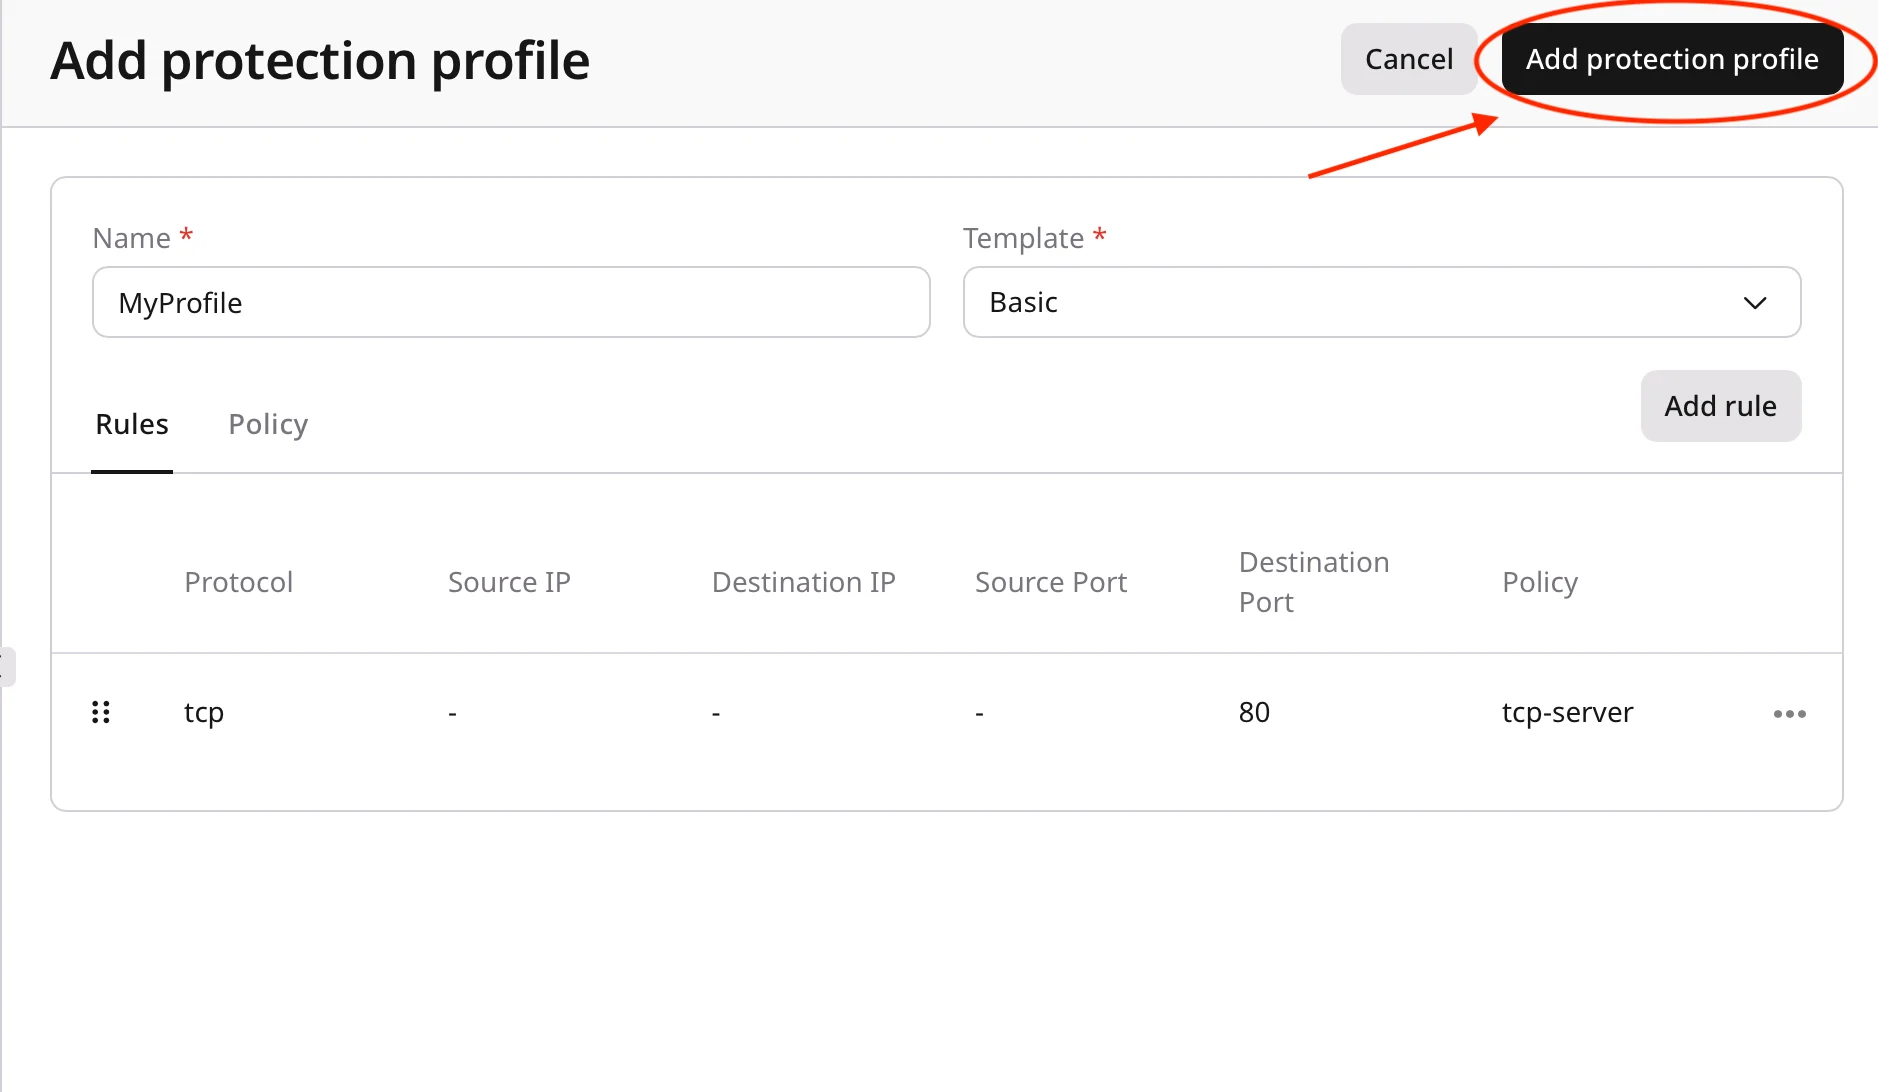
Policy reference
Select a policy ID that matches the traffic when adding a rule. Game policies inspect that game’s protocol. Default and rate-limiter policies cap generic floods. TCP policies run handshake or session countermeasures. Games without a dedicated policy use the matching default policy. Arma 3 and DayZ use UDP, so they usedefault-udp.
Best practices
Keep the following in mind when building and maintaining protection profiles.- Start with simple rules and expand them as needed.
- Apply a new profile to a non-critical network first, then check the events log before using it on production prefixes.
- Document rules and policies for future maintenance.
- Review and update profiles regularly based on traffic patterns.