Setup
- Download OBS from the official website.
-
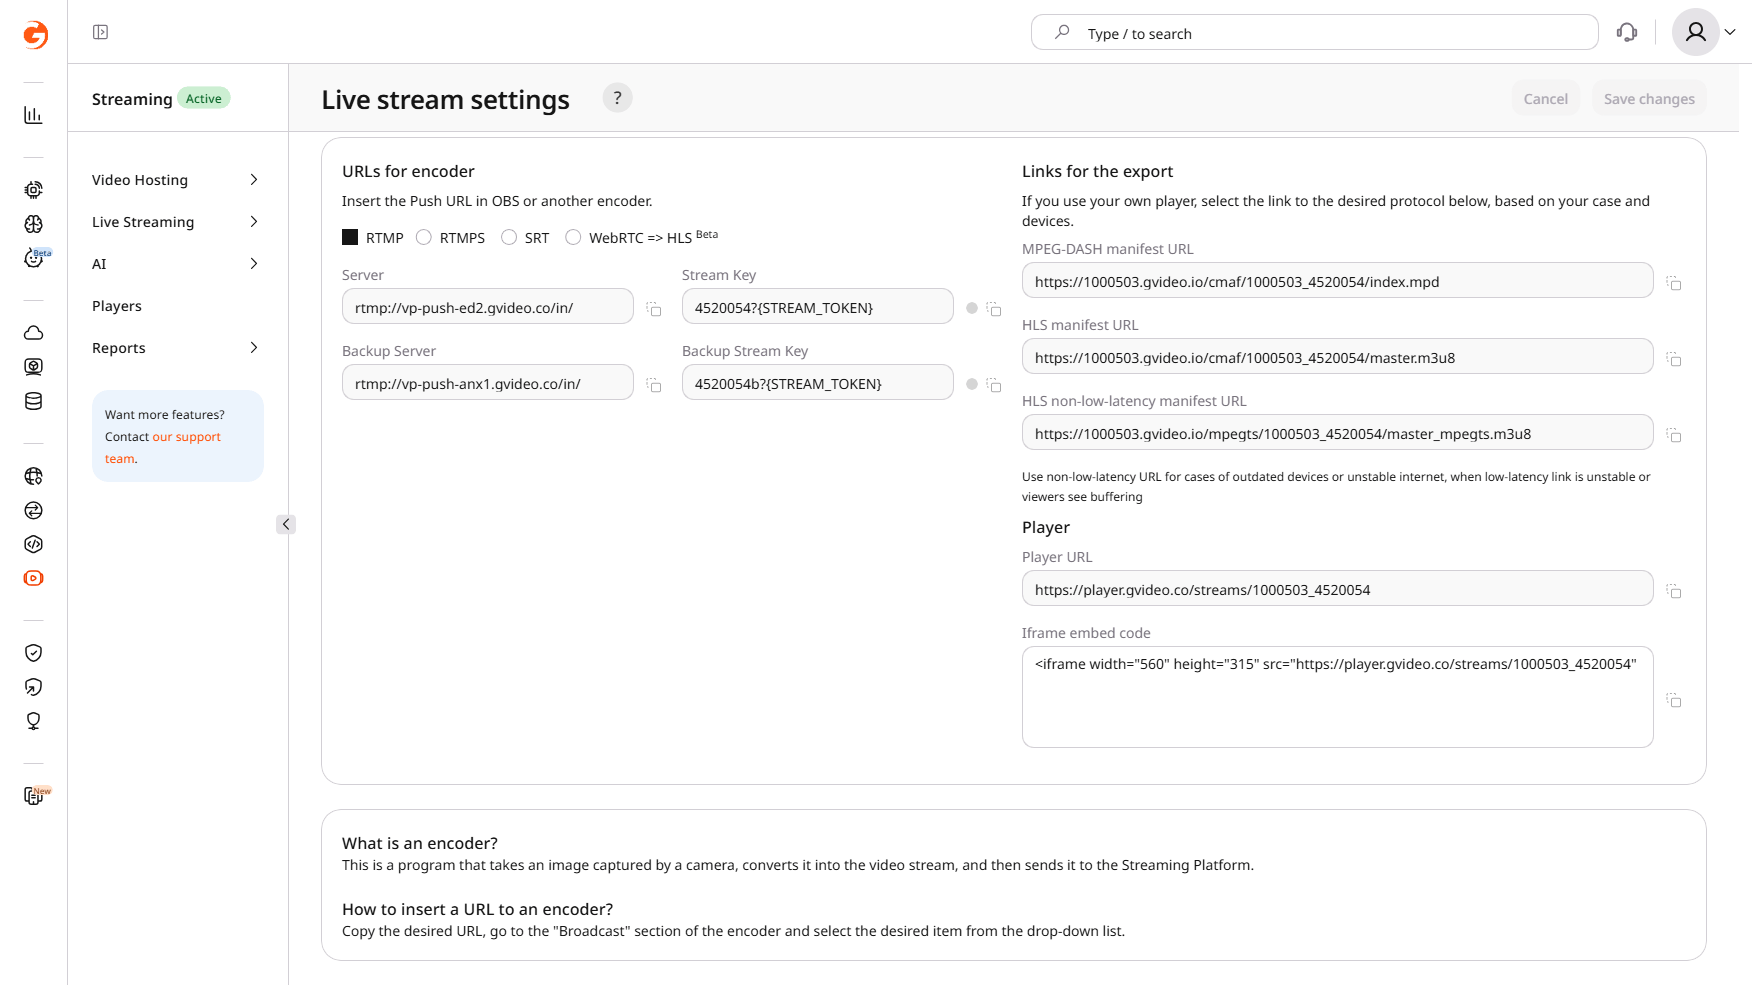
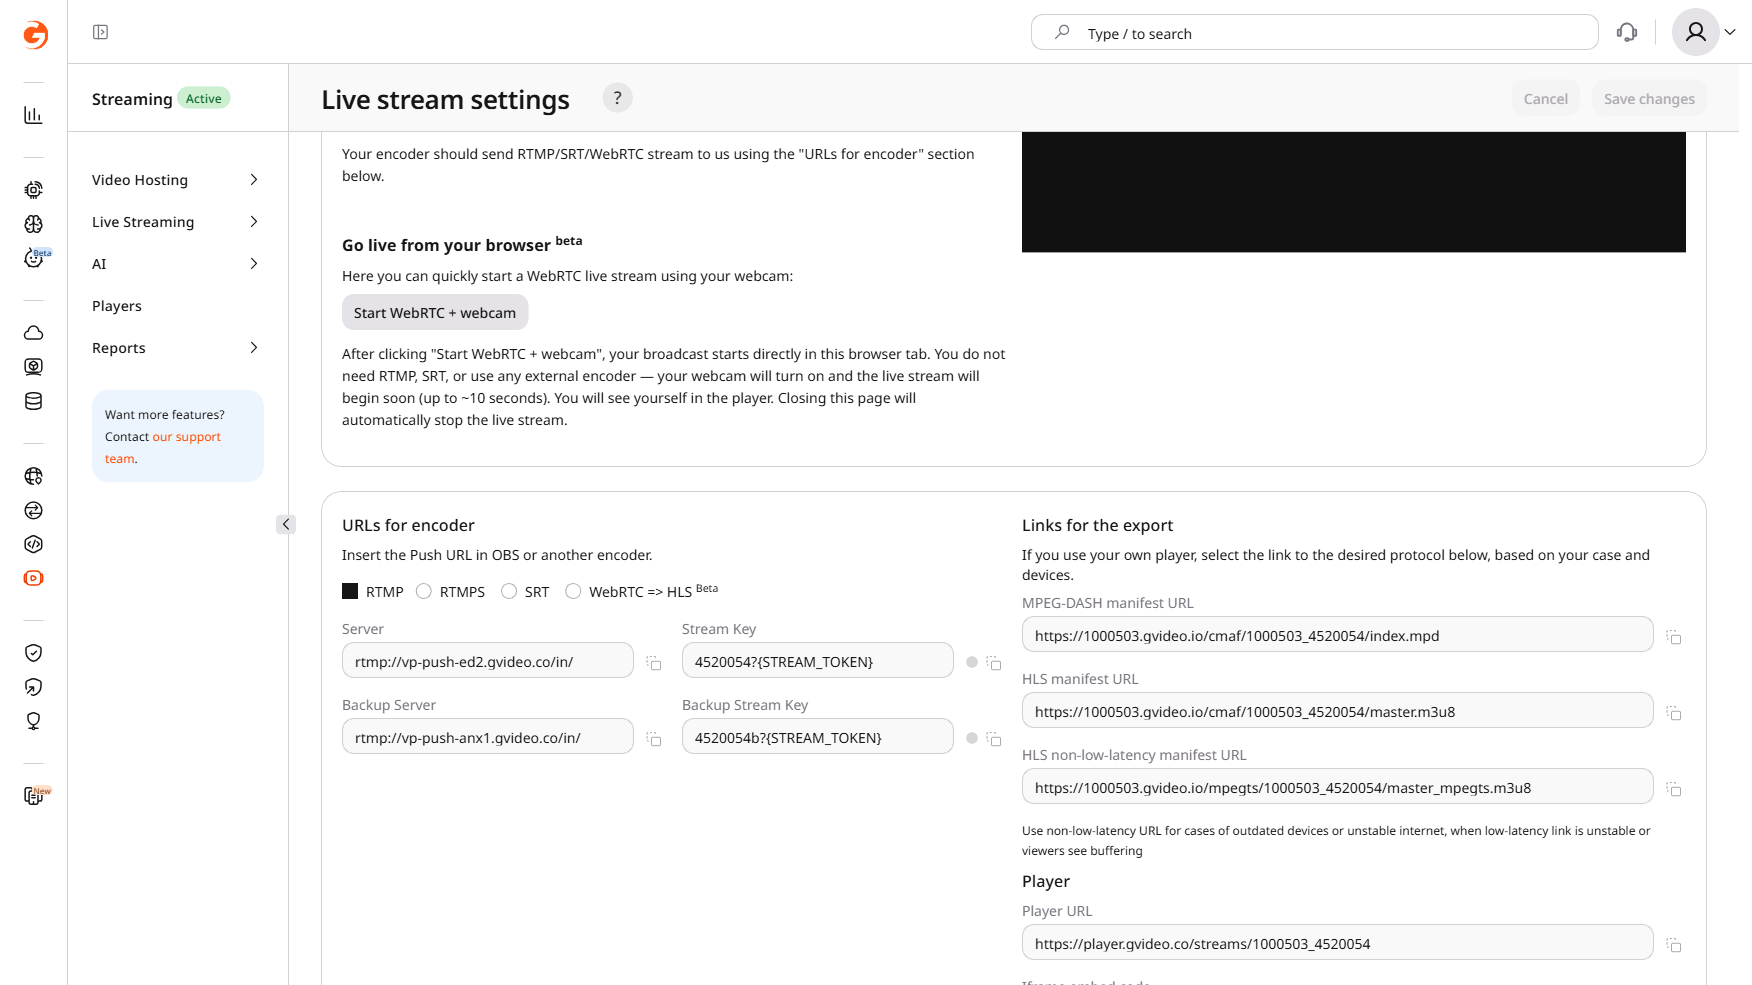
In the Gcore Customer Portal, navigate to Streaming → Live Streaming and open Live stream settings for the target stream. In the URLs for encoder section, select the RTMP tab and copy the Server and Stream Key values.
-
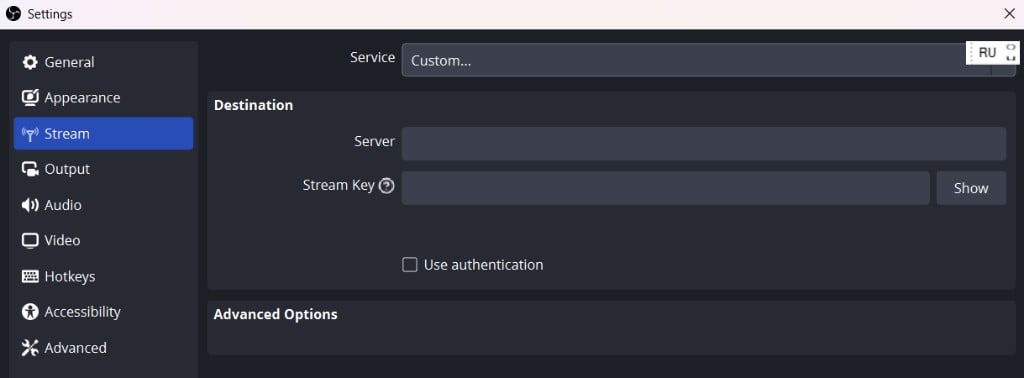
In OBS, open Settings and navigate to the Stream tab.
-
Select Custom… from the Service dropdown, then enter the copied values:
- Server URL into the Server field.
- Stream Key into the Stream Key field.
- Click Apply.
Configure encoding
Configure these settings before starting the stream. Open Settings in OBS, then navigate to each tab below.Output
-
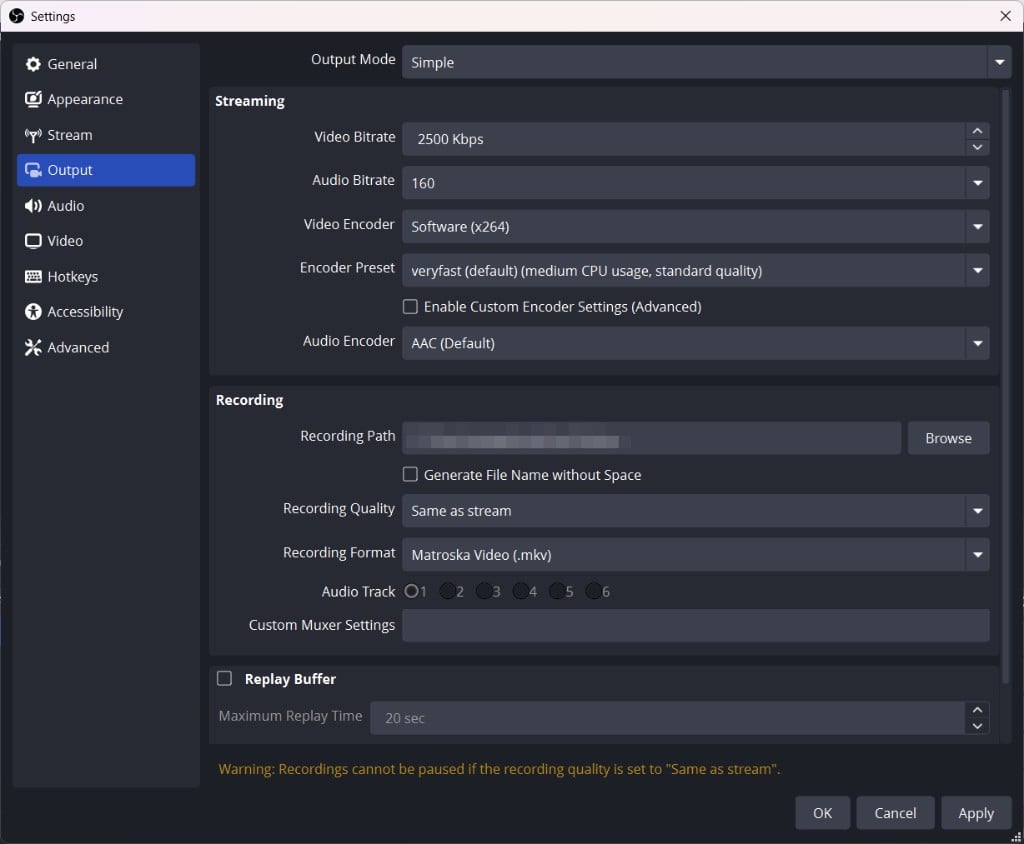
Navigate to the Output tab. In Simple mode, set the following:
- Video Bitrate: 2000 Kbps for 720p or 4000 Kbps for 1080p.
- Audio Bitrate: 128 Kbps.
- Video Encoder: Software (x264).
- Encoder Preset: veryfast.
-
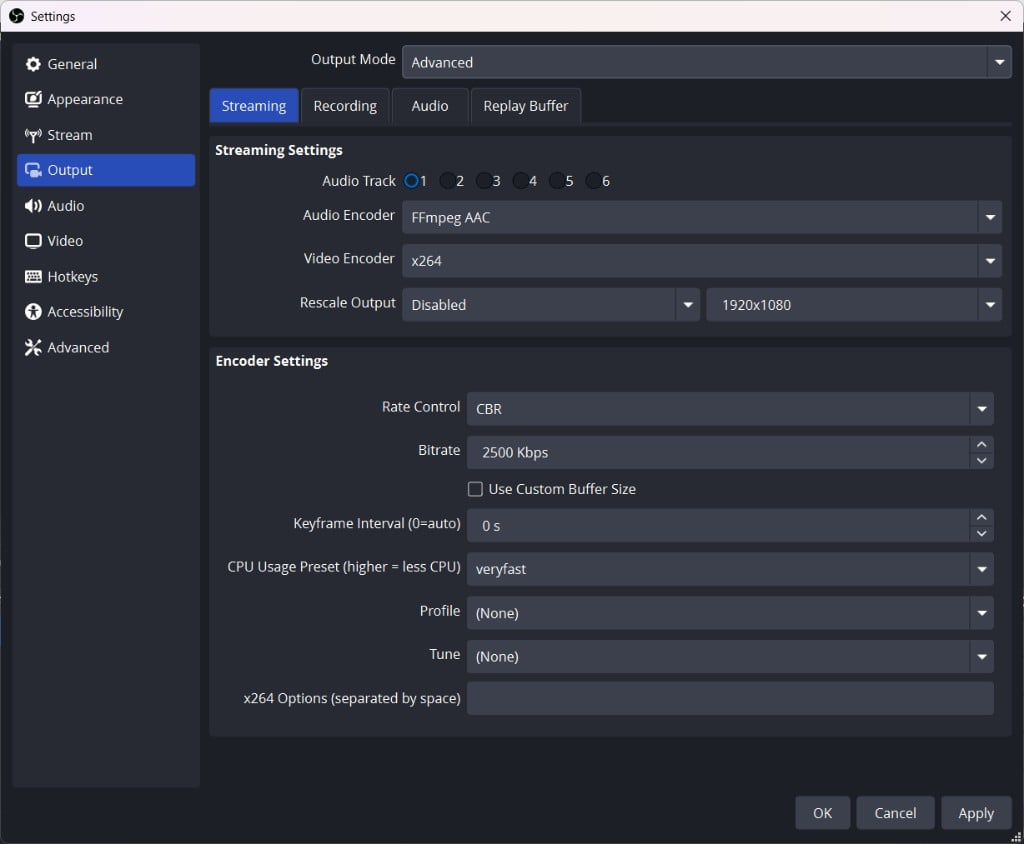
Switch Output Mode to Advanced. In the Encoder Settings section, set:
- Rate Control: CRF.
- Keyframe Interval (0=auto): 2 s.
- Profile: baseline.
- Click Apply.
Audio
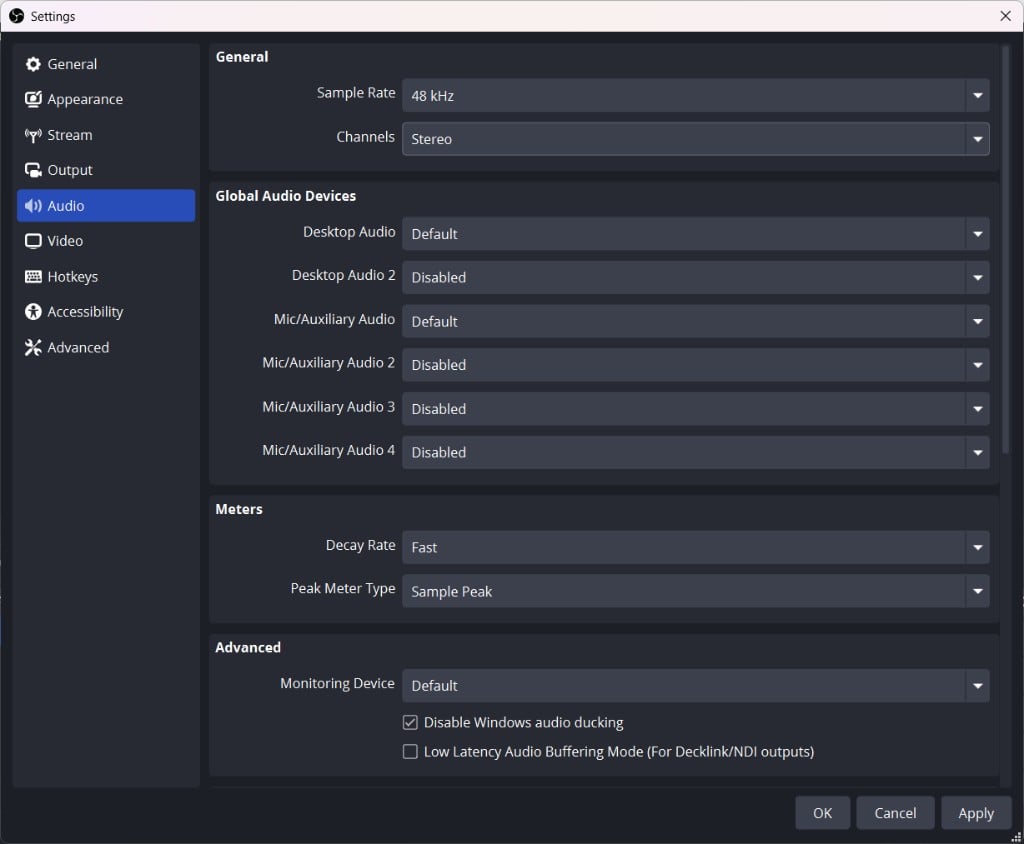
- Navigate to the Audio tab.
- In the General section, confirm that Sample Rate is set to 48 kHz and Channels is set to Stereo. These are the OBS defaults and require no change.
-
Click Apply.
Video (optional)
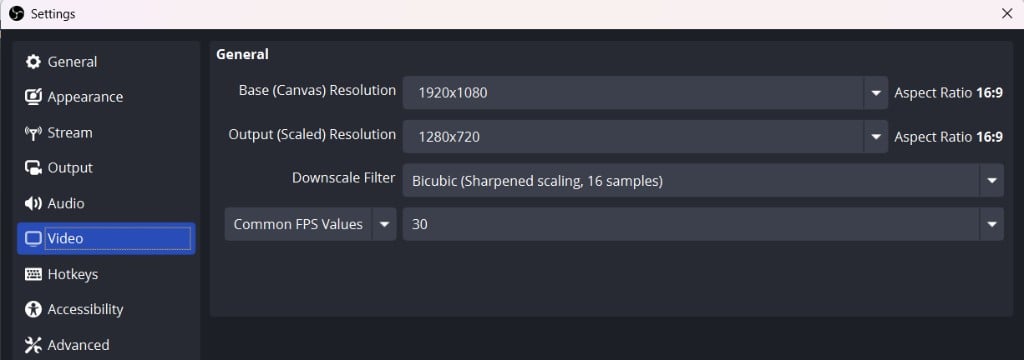
To downscale the source resolution:- Navigate to the Video tab.
-
Set the following:
- Output (Scaled) Resolution: 1280×720
- Downscale Filter: Bicubic
- Common FPS Values: 30
-
Click Apply.
Start streaming
In the main OBS window, select a source (video capture device, display capture, or another source) and click Start Streaming.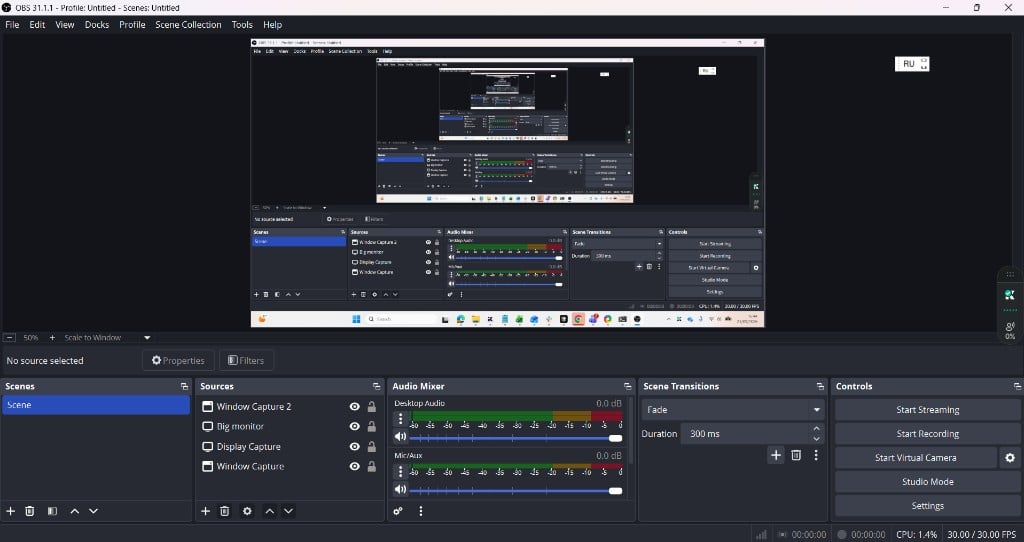
If OBS connects while already sending a reduced frame rate due to CPU overload, dropped frames, or unstable source timing, Gcore starts the transcoding session with that lower detected FPS. After fixing the source, restart the stream so a new session begins with the correct source metadata.